

How To Put Replacement Window In Awning Window
How to series
How to install an awning window

Awning windows are a popular choice for traditional and gimmicky homes akin. They offering a wide diversity of style and configuration options and let ventilation even when information technology's raining.
Right installation of all windows and doors is critical to ensure they operate as they should, without whatever headaches, for many years to come.
If you've procured your awning windows and are fix to install them into your holding, follow our simple step by step guide for correct installation.
Delight annotation, this article is merely a guide and may not exist suitable for every projection, please be sure to consider your specific needs before beginning installation.
Before you brainstorm.
As every site is different, be certain yous have the right safety gear for the site y'all're working in and the tools you'll be using. Please note that this article is a guide only, then we recommend relevant considerations exist made to adapt your project's unique requirements. This commodity references A&50's awning windows; if you are not installing A&L brand windows we recommend referring to the manufacturer's manual to ensure right installation of your specific products.
The tools you'll need.
You lot'll demand the following tools to install your awning window:
- Drill with 3mm bit that is used for pre-drilling the fixing holes
- Fixing nails or screws that are suitable to your specific installation
- Spirit level
- Tape measure out
- Hammer
- Packers
- Mini compression bar
- Staple gun and staples (if flashing is used)
- A friend/2nd pair of hands depending on size and weight of the product
How to install an awning window – the steps.
To install your awning window, follow the steps in our video below or read on for written instructions and images.
- Before beginning your installation, measure the height, width and depth of the product, and that of the opening you lot are installing into.
- The size of the opening needs to exist 20mm wider, and 30mm higher than the product to allow for a square and plumb installation.
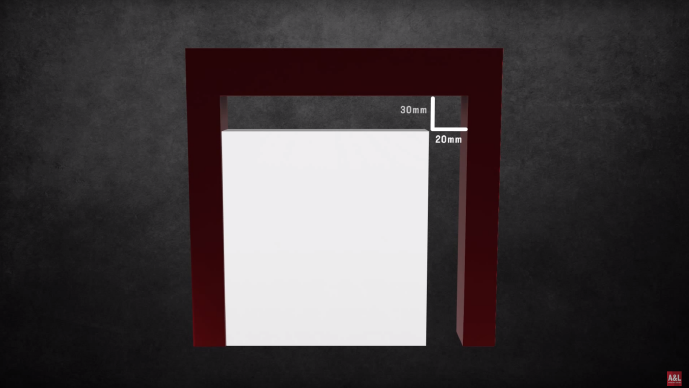
- The overall depth of the product needs to friction match the cladding blazon it is existence installed into. This volition be adamant when the production is ordered, but it never hurts to check twice.
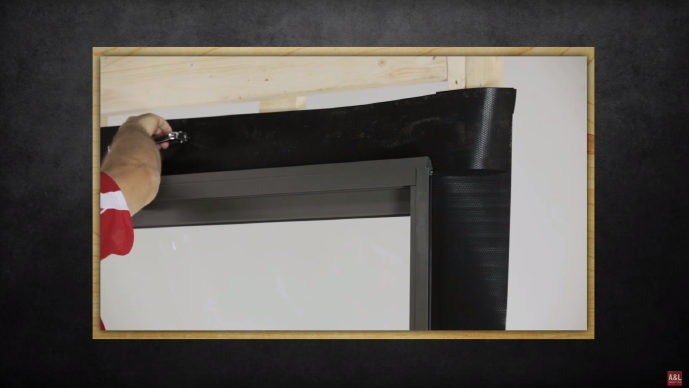
- You lot need to determine the blazon of flashing required. Nosotros offering a range of standard flashings, but it is up to the builder to decide how to make the edifice h2o tight.
- Flashing needs to be pulled forward and fixed to the face of the stud. This can exist done with a simple staple gun.
- Finally, it's a skillful idea to double bank check if any special installation requirements employ to the production you are installing. These could include:
- Specific head heights
- Special finishing details; or
- Coupling to other products
- Once all the cross-checking is consummate, information technology'south time to begin the installation.
- Firstly, place the spirit level on the bottom plate, and pack level where the product will sit.
- If packers are required, fix them into position with brad nails so they don't motility around.
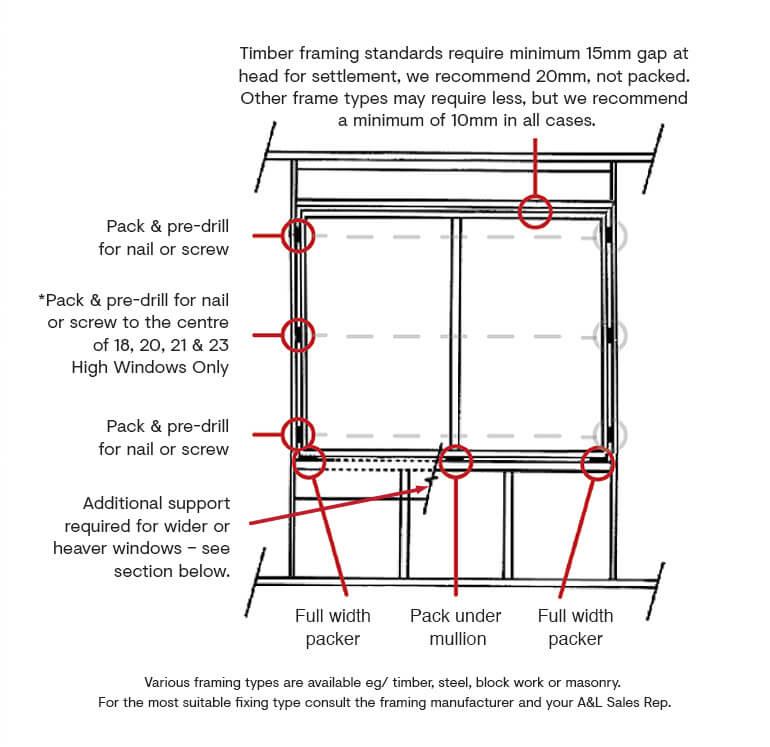
- Place a marking on the reveal of both jambs, 100mm from the top and bottom.
- Pre-drill a hole at each marker with a 3mm drill bit.
- Place the product into the opening from the exterior.
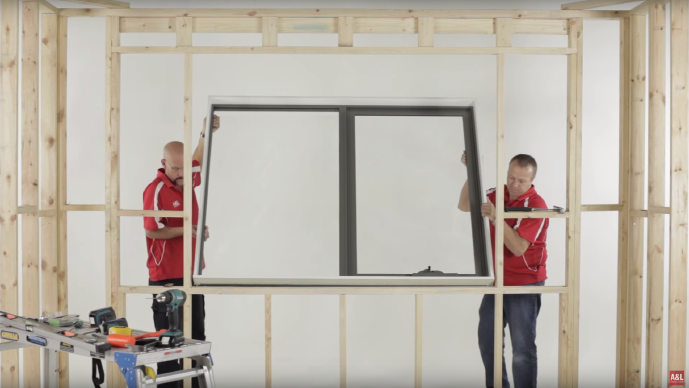
- A standard installation allows for 10mm of plaster on the inside, so using a 10mm packer or the thickness of a simple brickies ruler every bit a guide, overhang the reveal dorsum into the house by 10mm.
- Gear up a smash into the stud through the pre-drilled hole virtually the sill on both sides of the production. Practise not smash them in all the style.
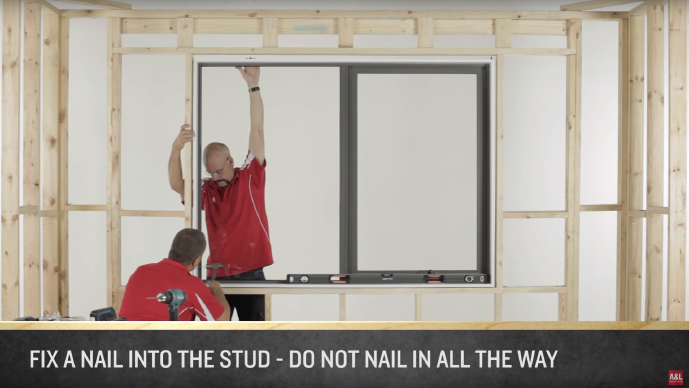
- Fix a nail into the stud through the pre-drilled holes at the meridian of the reveal. Again, practice not nail them in all the style.
- Holding your spirit level confronting the jamb, bank check that the product is both square and plumb.
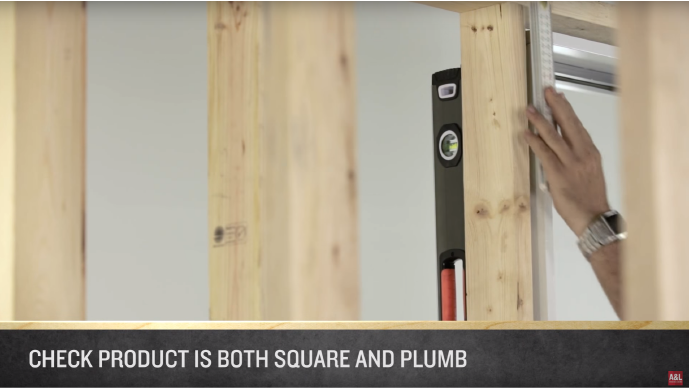
- Measure out the product diagonally in both directions to ensure information technology is square. Ideally you desire both measurements to be the same, just within a couple of millimetres is okay.

- Use the pinch bar to gently move the production into the right position if required.
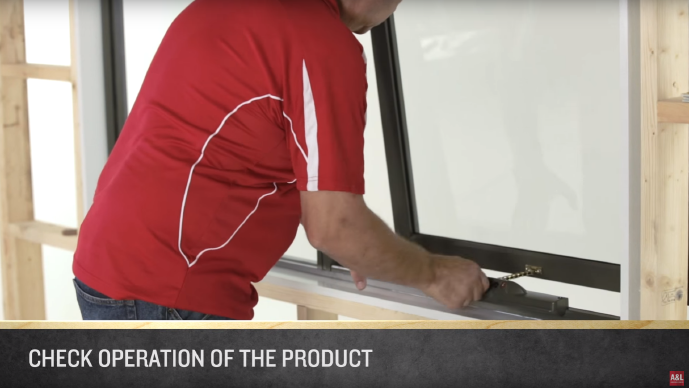
- Before packing and fixing off, information technology's a expert idea to check how the product is operating.
- Current of air out the sash and wind it back in to brand sure that both corners of the sash come up into contact with the sill at the aforementioned fourth dimension.
- If one side hits earlier the other, there is a slight twist in the vertical plane. Motion the top or lesser corner of the window in or out to align the sash across the lesser.
- Once happy with the product'south positioning, pack betwixt the reveal and the stud to a higher place the nails and bulldoze all the nails home.
- For taller products, you may demand to add additional fixings along the reveals on the jamb. If so, follow the aforementioned procedure of pre-drilling, packing and fixing ensuring the reveals remain plumb.
Installation snapshots.
Learn more.
Inspired? Get to know A&50's full range of stylish, durable windows, designed to suit your specifications.
View our range now

How To Put Replacement Window In Awning Window,
Source: https://www.alwindows.com.au/blog/how-to-install-an-awning-window/
Posted by: creekmoremustence.blogspot.com
0 Response to "How To Put Replacement Window In Awning Window"
Post a Comment